The Complete Guide to DIY Garage Door Repair Kits in Kansas City: Parts, Safety Tools, and Step-by-Step Fixes
When your garage door breaks down in the Kansas City Metro Area, your daily routine stops instantly. Homeowners are often told that every minor spring break or squeaky roller demands an expensive emergency technician visit. At U-Install Garage Doors, we know most garage door repairs are straightforward mechanical projects that you can safely complete yourself. By equipping you with commercial-grade parts, dedicated safety tools, and clear expert guidance, we help you fix your door correctly, avoid costly contractor markups, and master your home maintenance with complete confidence.
Understanding How Your Garage Door Counterbalance System Operates
Before picking up a wrench, every homeowner should understand the mechanical physics behind overhead doors. A standard residential garage door weighs anywhere from 130 to over 350 pounds, depending on panel construction, glass inserts, and insulation thickness. Your automatic garage door opener does not lift this massive dead weight through motor horsepower alone. Instead, the entire system relies on a counterbalance spring mechanism that offsets door weight, allowing a heavy door to be opened and closed smoothly with minimal effort.
The Mechanics of Torsion Springs vs. Extension Springs
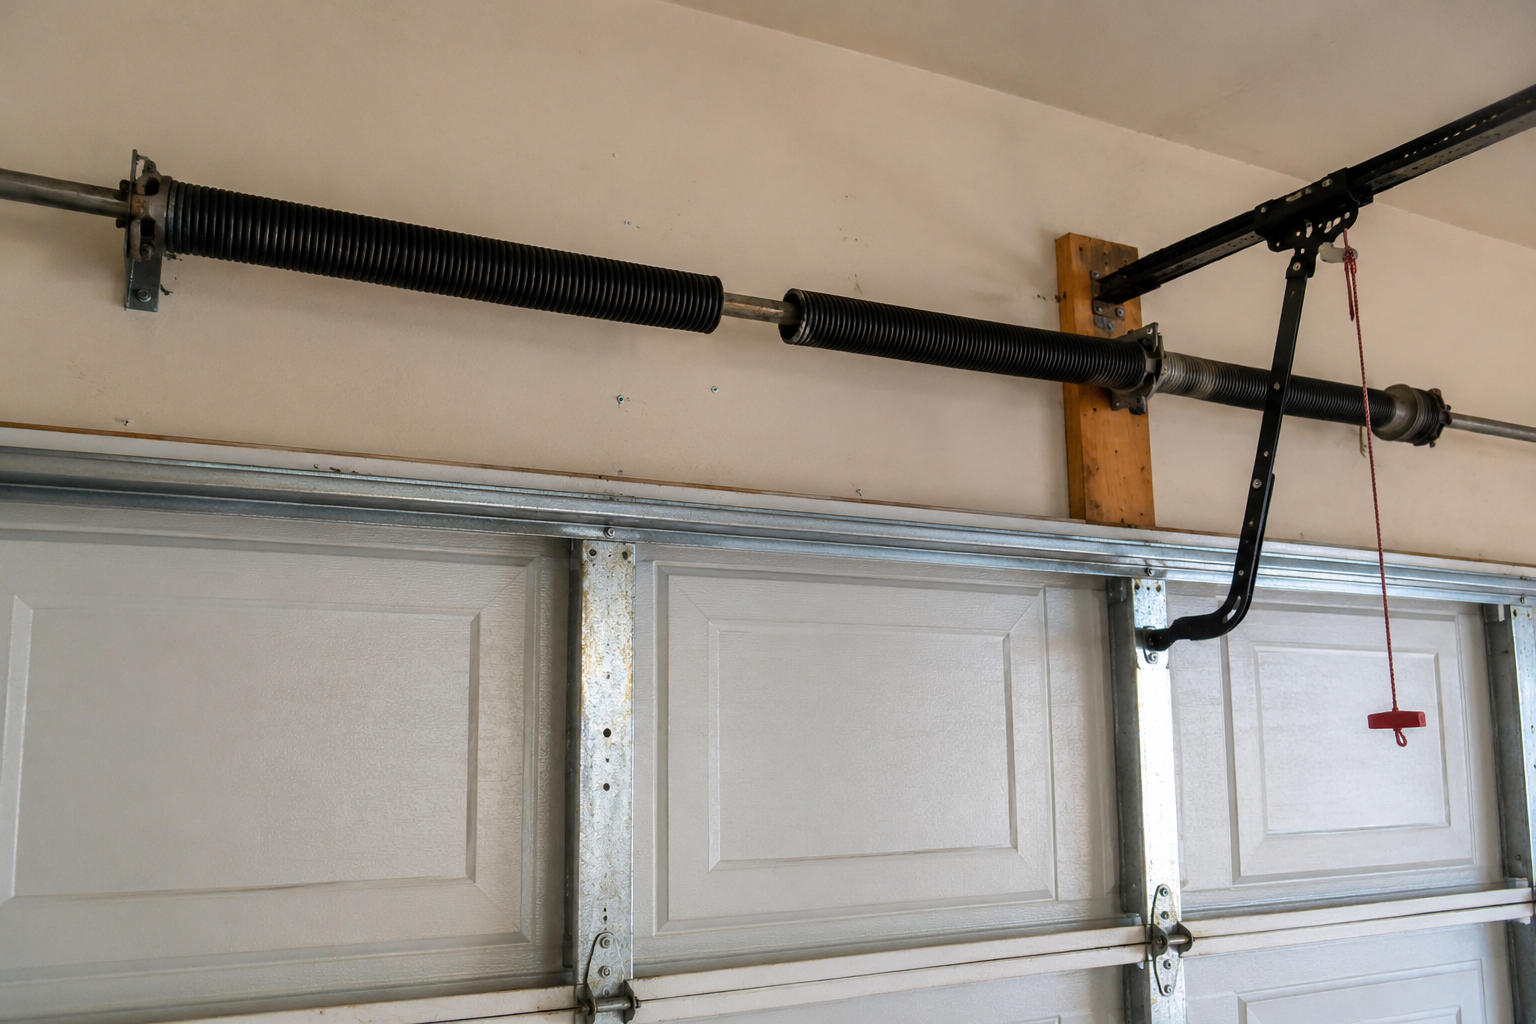
Torsion springs are mounted horizontally along a central steel shaft directly above the closed garage door opening. When the door closes, steel lift cables wrapped around aluminum end drums turn the shaft, winding the springs and storing mechanical energy. As the door opens, the springs release this stored torque to lift the door panels along the curved tracks. Extension springs, commonly seen in older homes across Gladstone and Kansas City, run parallel to the horizontal overhead tracks and stretch longitudinally to provide lifting assistance via a pulley cable system.
Why Counterbalance Balance Matters for System Longevity
When any single part of the counterbalance system fails or loses tension, excess load is transferred to surrounding hardware. Worn-out rollers increase friction against track curves, fraying cables risk dropping the door unevenly, and unbalanced springs force the opener motor to strain under heavy resistance. Addressing worn parts proactively prevents cascading mechanical damage and keeps your entire system working safely.
Why DIY Garage Door Repair Makes Sense for Kansas City Homeowners
Living in the Midwest means dealing with severe seasonal climate swings. In the Kansas City Metro Area, temperature ranges from humid summer heatwaves to sub-zero winter cold snaps cause metal components to expand and contract repeatedly. This constant thermal movement accelerates spring metal fatigue, dries out builder-grade grease, and causes track fasteners to loosen over time.
Eliminating Costly Contractor Markups and Service Calls
Many traditional repair companies charge expensive trip fees, emergency rates, and heavy markups on basic hardware. At U-Install Garage Doors, we provide an over-the-counter supply model that lets you purchase the exact commercial-grade parts you need without paying for unwanted labor or inflated service packages. You get the job done on your own schedule while saving hundreds of dollars.
Access to Commercial-Grade Hardware
Big-box retail stores often stock light-duty universal replacement parts rated for only 5,000 to 10,000 cycles. We stock professional, high-cycle oil-tempered springs, sealed 13-ball-bearing nylon rollers, and 7x19 aircraft cables that provide superior durability and quieter operation for local homeowners.
🛡️ DIY Safety Rules: “The Code”
Garage door repairs are manageable and cost-effective, but high-tension components must always be handled with respect. Follow these four mandatory safety rules every time you work on your door:
- Rule #1: Use the Right Tools. Never use a screwdriver, punch, or rebar pin to wind or unwind a torsion spring. Screwdrivers can snap or slip out of the winding cone, causing severe physical injury. We rent professional 1/2-inch and 7/16-inch hardened steel winding bars that seat securely into the winding cones. Always use professional winding bars.
- Rule #2: Respect the Tension. Always assume every spring, bottom bracket, and lift cable is fully loaded with active tension. Never loosen bottom corner bracket bolts while the door is down and cables are connected to the spring shaft.
- Rule #3: Clear the Area. Keep children, pets, and bystanders completely out of the garage and away from the door perimeter whenever you are adjusting springs, cables, or overhead tracks.
- Rule #4: If You’re Stuck, Call Us. If you get halfway through your project and feel uncertain about spring counts, shaft alignment, or balance, stop immediately. Do not force components. Call our team at 816-745-1372 for direct DIY advice.
Essential Components in a Comprehensive DIY Repair Kit
Having the correct parts before starting your repair ensures a smooth, uninterrupted fix. Here is a breakdown of the vital hardware components that make up a reliable DIY overhead door kit:
| Component | Function | Standard Lifespan | Pro-Grade Upgrade |
|---|---|---|---|
| Torsion Springs | Provides primary rotational lifting torque along the header shaft. | 10,000 cycles (approx. 7–10 yrs) | High-cycle oil-tempered or coated springs (20,000–30,000 cycles) |
| Extension Springs | Stretches along horizontal upper tracks to provide lifting assist. | 10,000 cycles | Double-looped open-eye ends with internal safety containment cables |
| Track Rollers | Smoothly guides door panels within vertical and curved tracks. | 3–5 years (plastic/steel) | 13-ball-bearing nylon rollers with sealed protective dust caps |
| Lift Cables | Transfers spring torque from drums to bottom panel brackets. | 5–8 years | 7x19 aircraft-grade galvanized steel cables (1/8" or 5/32" diameter) |
| Bottom Weather Seals | Seals the concrete threshold against water, cold air, and pests. | 3–5 years | Heavy-duty EPDM synthetic rubber T-end commercial retainers |
Step-by-Step DIY Guides for Common Garage Door Repairs
1. Replacing Squeaky or Worn Track Rollers
Worn steel or plastic rollers create harsh grinding noises and add drag to your opener. Upgrading to sealed nylon ball-bearing rollers restores silent, fluid motion.
- Disconnect Motor Power: Unplug the opener unit or pull the emergency disconnect red cord while the door is resting completely closed.
- Replace One at a Time: Work panel by panel starting from the center hinges. Unscrew the hinge mounting bolts with a 7/16-inch socket.
- Swap the Roller Stem: Tilt the hinge bracket free, slide the old roller out of the track, insert the new nylon roller stem into the hinge sleeve, set the wheel into the track channel, and re-bolt the hinge securely into the existing panel holes.
- Handle Bottom Rollers Carefully: The lowest roller is housed in the bottom corner cable bracket. Never unbolt this bracket while cables are under tension. To replace it safely, gently flex the track lip open at the bottom with an adjustable wrench, roll the roller out, insert the new wheel, and tap the track lip straight with a wooden block.
2. Safely Replacing Broken Torsion Springs
When a torsion spring snaps, you will observe a distinct gap in the coil along the shaft above the closed door. Always replace torsion springs in pairs to ensure even mechanical balance.
- Measure Spring Specifications: Accurately record the wire gauge (measure 20 coils pressed together), inside diameter (usually 1.75" or 2", marked on the cone), overall length, and coil wind direction (Right Hand Wind vs. Left Hand Wind).
- Lock the Door in Place: Clamp two heavy-duty locking pliers onto both vertical tracks directly above the bottom rollers to prevent the door from shifting upward unexpectedly.
- Unwind the Intact Spring: Insert a 1/2-inch hardened steel winding bar fully into the bottom socket of the unbroken spring cone. Hold steady upward pressure, loosen the set screws, and slowly unwind one quarter-turn at a time using alternating winding bars.
- Remove and Replace Hardware: Loosen cable drum set screws, remove center bearing plate fasteners, slide the central shaft sideways through the end bearing plates, remove old springs, and slide your new high-cycle springs and drums into position.
- Wind to the Correct Count: Reassemble the shaft assembly and tighten the drums. Using professional winding bars, wind each spring the exact required number of quarter turns (usually 30–32 quarter turns for standard 7-foot doors). Tighten set screws 1/2 turn past point-of-contact with the shaft, apply garage door lubricant, and test manual door balance.
3. Aligning Tracks and Tightening Loose Fasteners
Over thousands of operational cycles, regular door movement can cause track brackets and hinge fasteners to loosen, creating gaps and binding.
- Check the track-to-door gap along the entire vertical height; spacing should remain between 1/2 inch and 3/4 inch.
- Use a 7/16-inch socket wrench to snug up all hinge fasteners. Do not overtighten into thin steel sheeting.
- Wipe track interiors clean with a dry rag; never apply heavy automotive grease inside tracks, as it collects dirt and grit.
Specialized Solutions for Commercial, Roll-Up, and High-Speed Doors
Beyond standard residential overhead doors, U-Install Garage Doors provides heavy-duty hardware and replacement components for commercial facilities and storage facilities throughout Kansas City:
Roll-Up & Storage Unit Doors
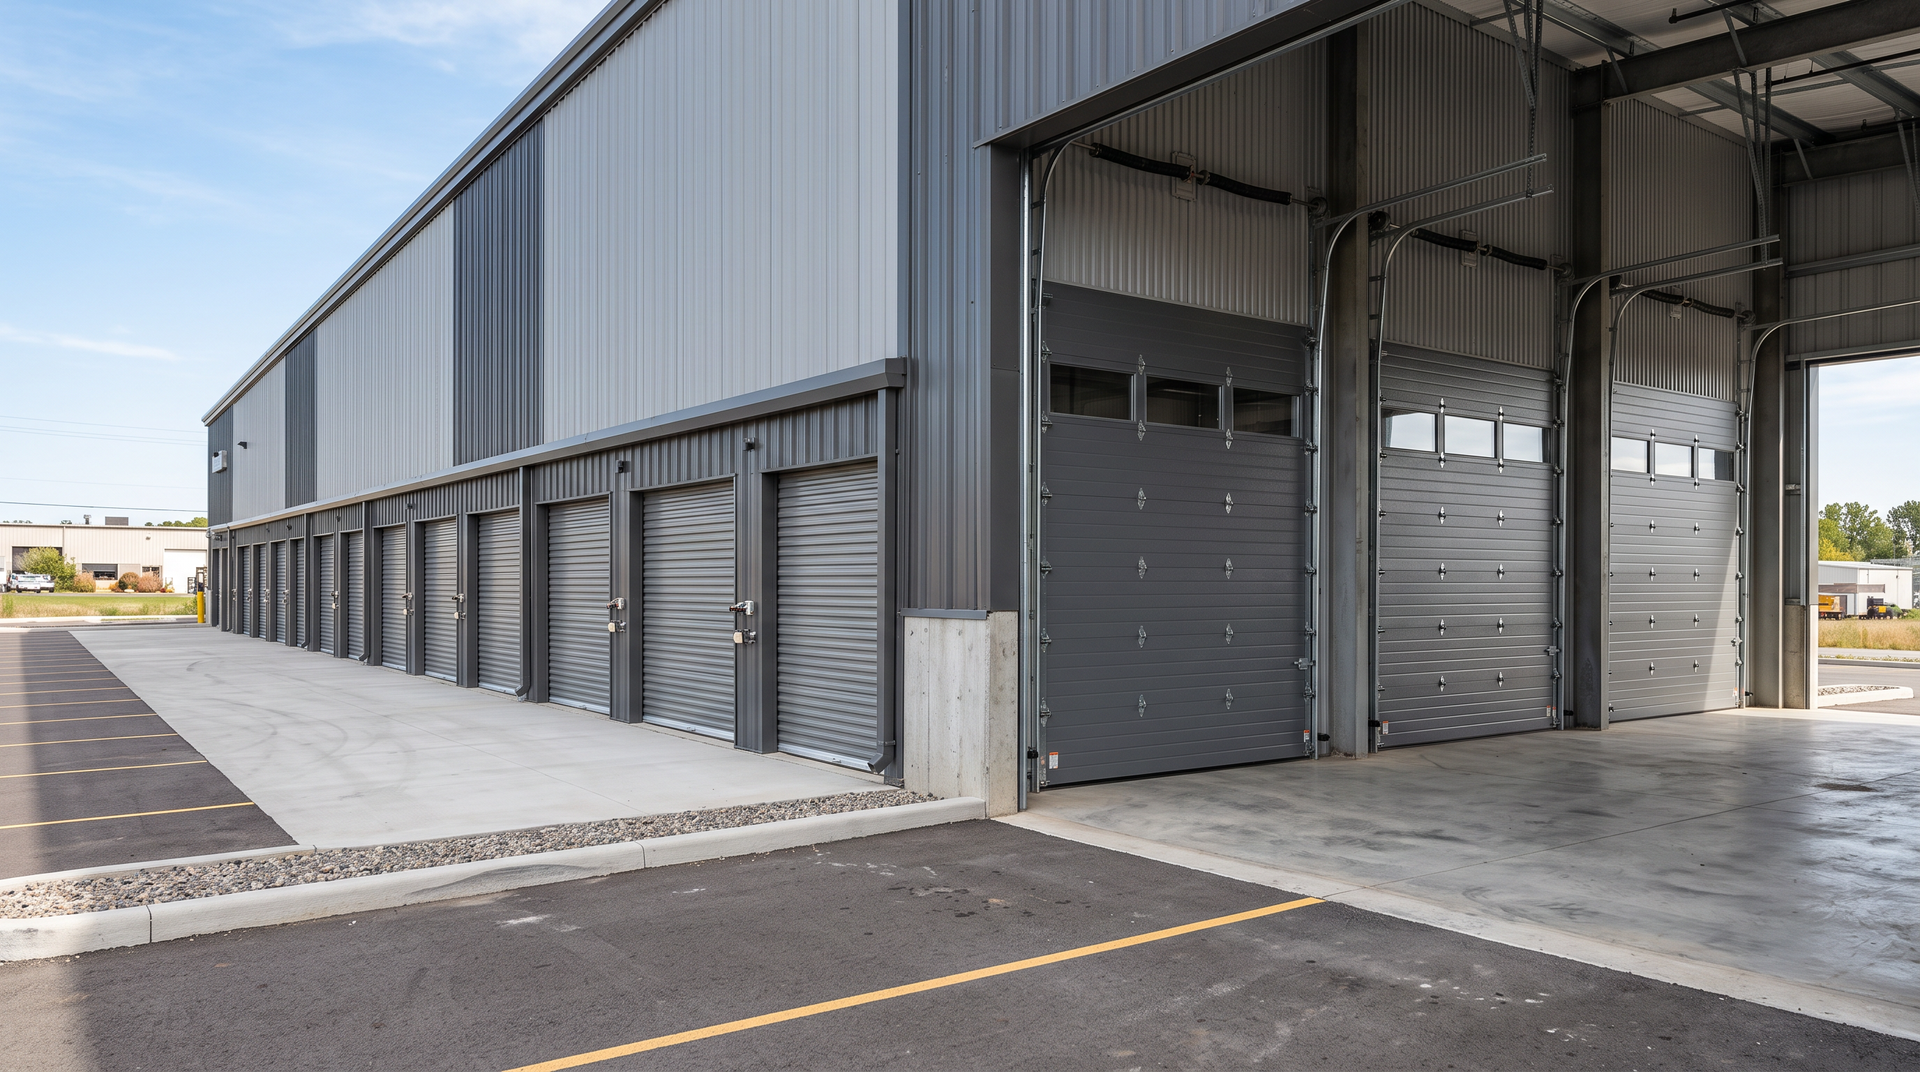
Self-storage facilities and pole barns utilize continuous corrugated steel curtain doors that experience heavy daily cycle counts. Over time, internal barrel springs lose tension, curtain guides wear down, and slide latches get bent or jammed. We carry replacement mini-warehouse springs, slide locks, bottom bar weather seals, and heavy-duty brackets designed to handle the heavy demands of commercial self-storage facilities.
High-Speed Curtain Doors
Distribution centers, auto service bays, and industrial processing hubs require high-speed fabric and vinyl curtain doors to maintain climate control, reduce dust infiltration, and maintain traffic flow. We provide heavy-duty drive belts, curtain guides, counterweight cables, and high-frequency replacement parts to minimize facility downtime and maintain efficient commercial operations.
How U-Install Garage Doors Supports Your DIY Success
You never have to tackle garage door repairs alone. Here is how we help homeowners and DIY enthusiasts across Gladstone, Liberty, and the greater Kansas City Metro complete repairs safely and affordably:
Over-the-Counter Precision Matching
Bring your broken spring fragments, worn rollers, damaged cables, or bent hinges directly to our supply counter. We will measure wire gauges, determine inside diameters, and match the exact replacement part on the spot.
Professional Tool Rentals
Safe spring work requires specialized equipment. We rent professional-grade hardened steel winding bars, cable tensioners, and installation tools so you do not have to purchase expensive tools for a one-time fix.
Experienced Technical Advice
Our team has over 20 years of real hands-on experience in the garage door industry. We explain each step in plain, practical language, highlight potential pitfalls, and guide you through the process from start to finish.
No Unwanted Service Call Upselling
We do not perform installation or repair service calls. Our sole focus is supplying you with top-quality parts, proper tool rentals, and DIY guidance so you can get the job done right and save money.
Frequently Asked Questions (FAQ)
How do I know what size garage door spring I need?
To identify the correct torsion spring, you must determine four specific measurements: wire diameter (measure the length of 20 continuous coils and divide by 20), inside diameter (usually 1.75" or 2", stamped on the cone), overall spring length (measured when the spring is completely unwound), and the wind direction (Right Hand Wind or Left Hand Wind). If you bring your broken spring to U-Install, we will measure and match it immediately.
Can I lift my garage door if a spring is broken?
We strongly recommend keeping the door closed when a spring is broken. Attempting to lift the door with an automatic opener can strip the opener gears, burn out the motor, or bend the top door section. If you must lift the door manually in an emergency, it will require two adults lifting evenly from the bottom edge while keeping fingers clear of panel joints.
How often should garage door rollers and springs be replaced?
Standard builder-grade springs last approximately 10,000 cycles, which equates to roughly 7 to 10 years for a household using the door 3 to 4 times a day. Upgrading to high-cycle springs extends that lifespan to 20,000–30,000 cycles. Sealed nylon rollers typically last 10,000 to 15,000 cycles without requiring ongoing lubrication inside the bearings.
What type of lubricant should I use on my garage door?
Always use a dedicated garage door spray lubricant or a non-silicone petroleum-based spray on steel hinges, roller stems, and torsion spring coils. Never use standard WD-40 (which acts as a solvent and strips lubrication) or heavy automotive grease (which traps dust, grit, and winter road salt, accelerating component wear).
Get the Right Parts and Advice Today!
Do not let a broken spring or noisy roller keep your vehicle trapped in the garage. Whether you need heavy-duty torsion springs, smooth nylon rollers, lift cables, bottom weather stripping, commercial roll-up parts, or professional winding bar rentals, U-Install Garage Doors is your trusted local source.
📞 Call us today at 816-745-1372 or visit https://www.uinstallgaragedoorstore.com/ to pick up the parts, tools, and step-by-step DIY advice you need to get your garage door running safely and smoothly!
#UInstallGarageDoors #KansasCity #GarageDoorParts
Recent Posts